Living Room Makeover- One Room Challenge Week 5
This week, let’s talk window treatments!
Our living room has two single hung windows. One faces the road while the other faces our very private side yard. We live in a small village so privacy isn’t a huge concern since our home is set back off the road a bit. However, I do like the texture and softness that window panels add to a space. I also opted to go with roman blinds as well for texture and I do like the coziness blinds add to a space especially in the fall and winter months when it gets darker earlier. I do find myself pulling the blinds down more this time of year.
In this week’s post, I want to share a hack I have to make inexpensive Ikea curtains look a lot more polished. I share this hack with my clients all the time because let’s face it, not everyone has the budget for custom window treatments.
For our living room makeover, I decided to splurge on the blinds (more coming on that in a future blog post) and save on the window panels. Since my panels are mostly decorative and the blinds will be subjected to UV, I didn’t want my blinds to breakdown, fade, or the mechanism to fail, etc over time. With that being said, I didn’t want my panels to “look cheap” next to my nice blinds.
Here’s the deal…..
WINDOW TREATMENTS ARE HARD.
All too often, I see window panels installed incorrectly, not enough fullness, too short, too long, etc. And I’m here to tell you that poorly installed window treatments will break a room’s overall look.
To keep things fresh, I love the look of a crisp warm white panel. I tend to stay away from heavy colors, lots of pattern, etc. I find a natural linen or white adds that softness I mentioned without making the space feel heavy or visually busy.
My favorite affordable white curtains are the Ikea Ritva. We LOVE them for their nice heavy white fabric and their affordable price: just $39 for two 98″ tall curtains (which means they’re long enough to go from floor-to-ceiling in a standard eight foot room). And if you have extra tall rooms you can also get two of their 108″ length for $49!
And now for a curtain-related side rant:
don’t buy too-short curtains at Walmart, Giant Tiger, etc! I don’t even know why anyone makes 84″ curtains because it’s SO MEAN and they’re never tall enough to make a room look as good as it could with taller curtains!
Ikea’s Ritva curtains have a decent weight to them – in fact they look extremely similar to curtains sold by West Elm and Pottery Barn but they’re a heckova lot more budget-friendly. But let me tell you… Ikea’s photos of these curtains are so not-selling that because they’re actually sold with these country-looking tiebacks, and they essentially look nothing like this:
Here’s how I make these inexpensive curtains look more polished.
STEP 1.
Wash them on warm and dry them on high to pre-shrink them (they’ll shrink a ton – maybe 5″, but in a standard height room that’s just fine – and you NEED to preshrink curtains before you hang them. Otherwise, if they get dirty later and you launder them, they’ll look like bad highwaters when you hang them back up. Note: I don’t recommend washing them on hot as they may shrink too much– so that’s my warning! I tend to launder on cold water and dry them to damp dry in the dryer.
STEP 2.
Install the curtain hooks on the back side of your panels. I do ten hooks per panel so one pack of the Riktig is all you’ll need for a pair. Using these hooks will allow you to get the custom pinched pleat look at the top of your panels.
STEP 3.
Install the drapery rings onto your curtain rod. These come in packs of 10 for $5 each so you will need two packs. You will attach them to the hooks on your panels like this:
STEP 4.
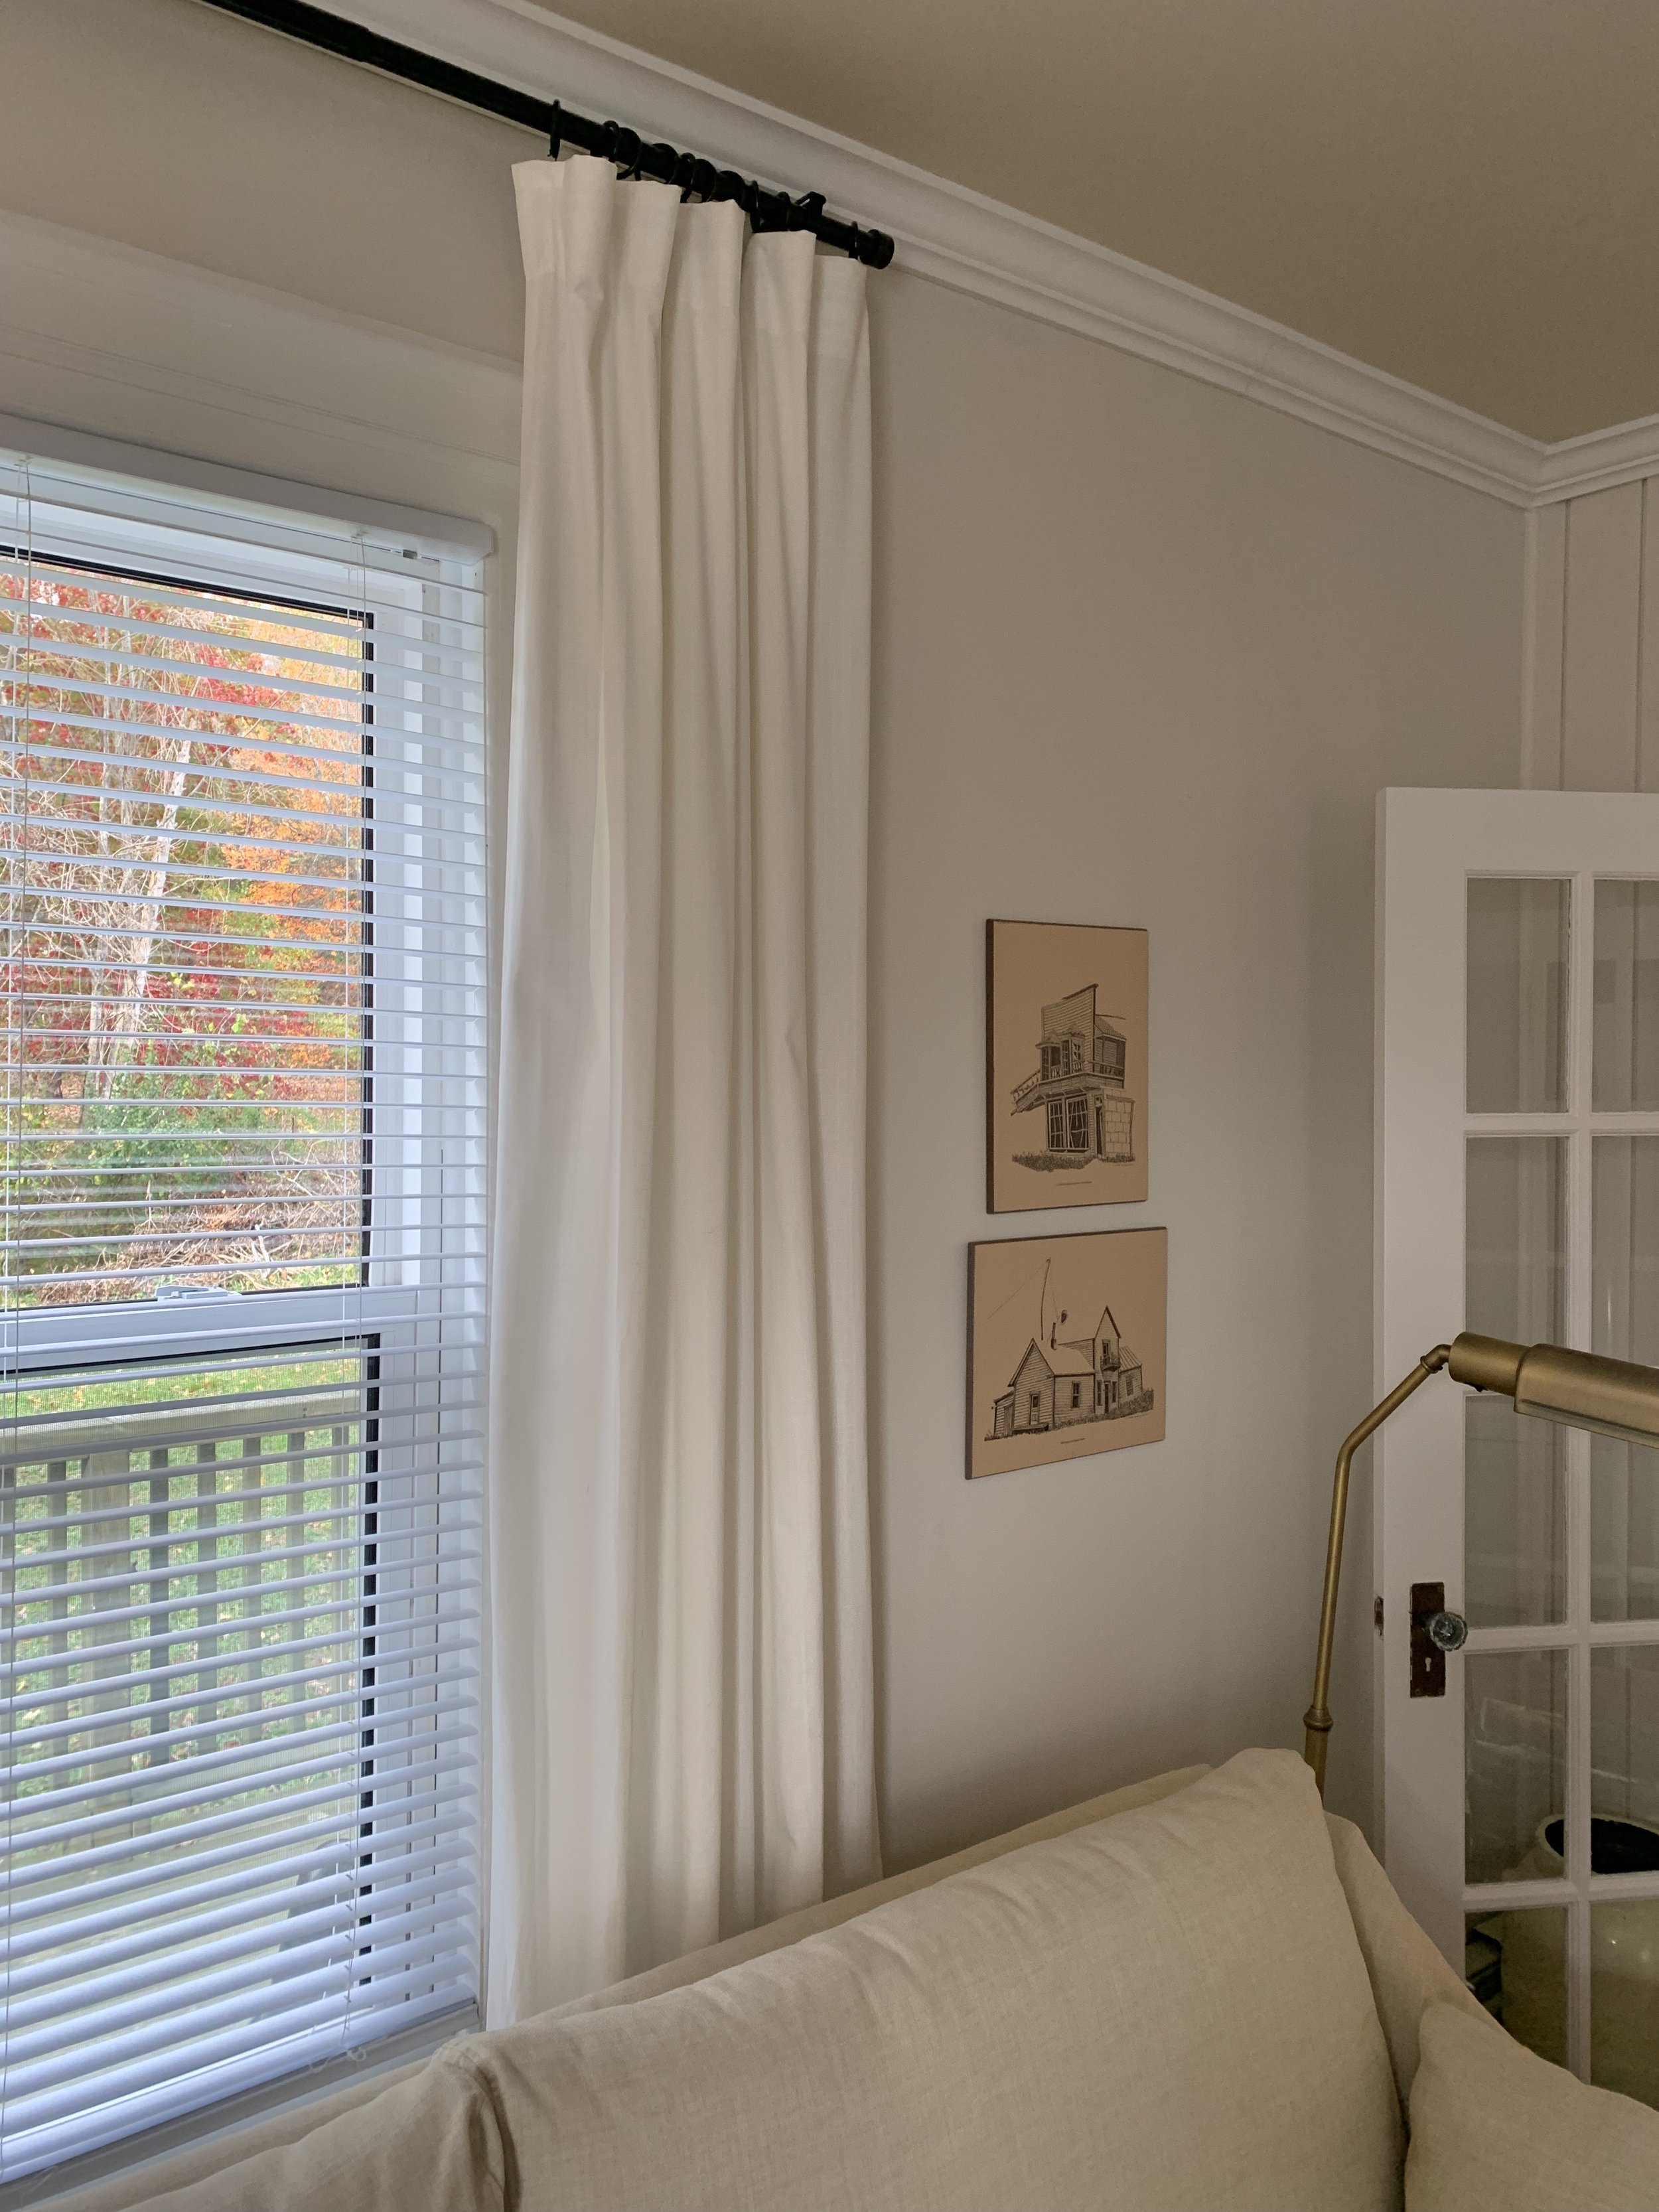
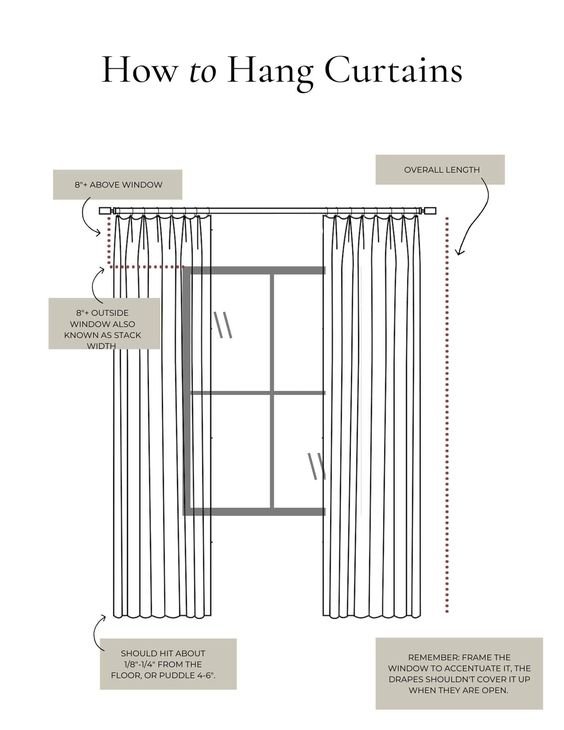
Slide two pre-washed & clipped panels onto your curtain rod, and hold it up to determine the best height to install it. Remember to go high and wide around your window, but not so high that the curtains don’t touch the floor, and not so wide that they look flat (volume from the curtains draping is really pretty). The rule is up to 8” but we typically go 6″ beyond the window trim on the sides, and like to hang the rod a few inches below the ceiling, but use the length of your panels to determine the best height. In our living room, I installed the curtain rod just below our crown moulding. This makes the window and the ceiling appear taller. Otherwise, I tend to install at the halfway point from the top of the window trim to the ceiling. Do not install your rod to your window trim or immediately above window trim. This is not to scale and will make your ceilings appear lower and your windows to look short.
I like to use the Hugad rod as I like the diameter and I never feel the rod is sagging from the weight of the curtains. The brackets are sold separately. They are sold individually so be sure to pick up two and you’ll need a pair of finials for your rod as well.
STEP 5.
Iron or steam your curtains. I steamed the curtains while they are hung in place – but I found that we got the best result with two people doing that (one to hold the curtain taut, the other to steam. To get the smoothest result with just one person on curtain duty, I recommend to take them down and iron them.
STEP 6.
Once the curtains are pre-shrunk and fully relaxed, it’s safe to hem them if you need to. Sometimes you get lucky and they shrink enough so that you can hang them high without needing any hemming . That was the case in our living room. If hemming is out of your wheel house, you can use the new sew hem tape that comes with the panels. All you need to do is fold the hem, lay the strip in place and iron it with a warm iron. I like my panels to just kiss the floor and typically like them to hover just 1/8 to 1/4 inches above the floor. If I do go for the puddle look, I reserve that for bedrooms as I find it way too dusty.
There you have it. My hack to make inexpensive Ikea curtains look more polished.
Are they the most luxe high-end curtains out there? Nope. Do we think they look nice, hold up well, and add softness & height to a room? Yes. Did we do the entire living room for $132? Yup. And that’s less than the cost of one pair of these stock white 95″ curtain panels (and we got 4panels plus all the pieces to hang them!). Getting custom curtains can also be significantly more expensive – and it can make them feel extra precious. They’re also not usually washable which is a huge selling point for me when it comes to these.
This isn’t an anti-custom window treatment rant. I’ve used custom window treatments as well as panels from PB and WE several times over with clients. I just know lots of people who can’t swallow that custom curtain price tag right now, and might want something that feels easier to live with/wash for this season of life. So hopefully this elbow-grease-but-affordable method can help you get SOME sort of window treatments in your house.
And don't forget to check out the featured designers and participating guests of the ORC!


