Cottage Bath Makeover
We live in a 100+ year old 1.5 storey home that definitely has some cottage vibes. Perhaps it the quaint village setting and that the Avon River is just a short 5 minute walk away. Either way, I knew I wanted our main bath to have a more coastal cottage aesthetic.
The before was nothing to write home about- it was lacklustre to say the least. The only thing going for it was the vanity and linen tower was made from wood and provided a ton of storage with the linen tower even having sliding pull outs. The flooring had been updated in recent years to marble/limestone look vinyl tile. Other than that, that was the only two things going for the space.
When I started this makeover for our facebook group’s Spring Room Refresh Challenge, I had a small budget to pull this off. We had completed a living room makeover as part of the One Room Challenge back in the fall and in January we started our son’s bedroom that went way over budget. (I have yet to write a blog post on that makeover).
Before I start any project, client or personal, I take the time to sit down and answer these questions and then I get to work creating my mood board.
Let’s get the before out of the way shall we?
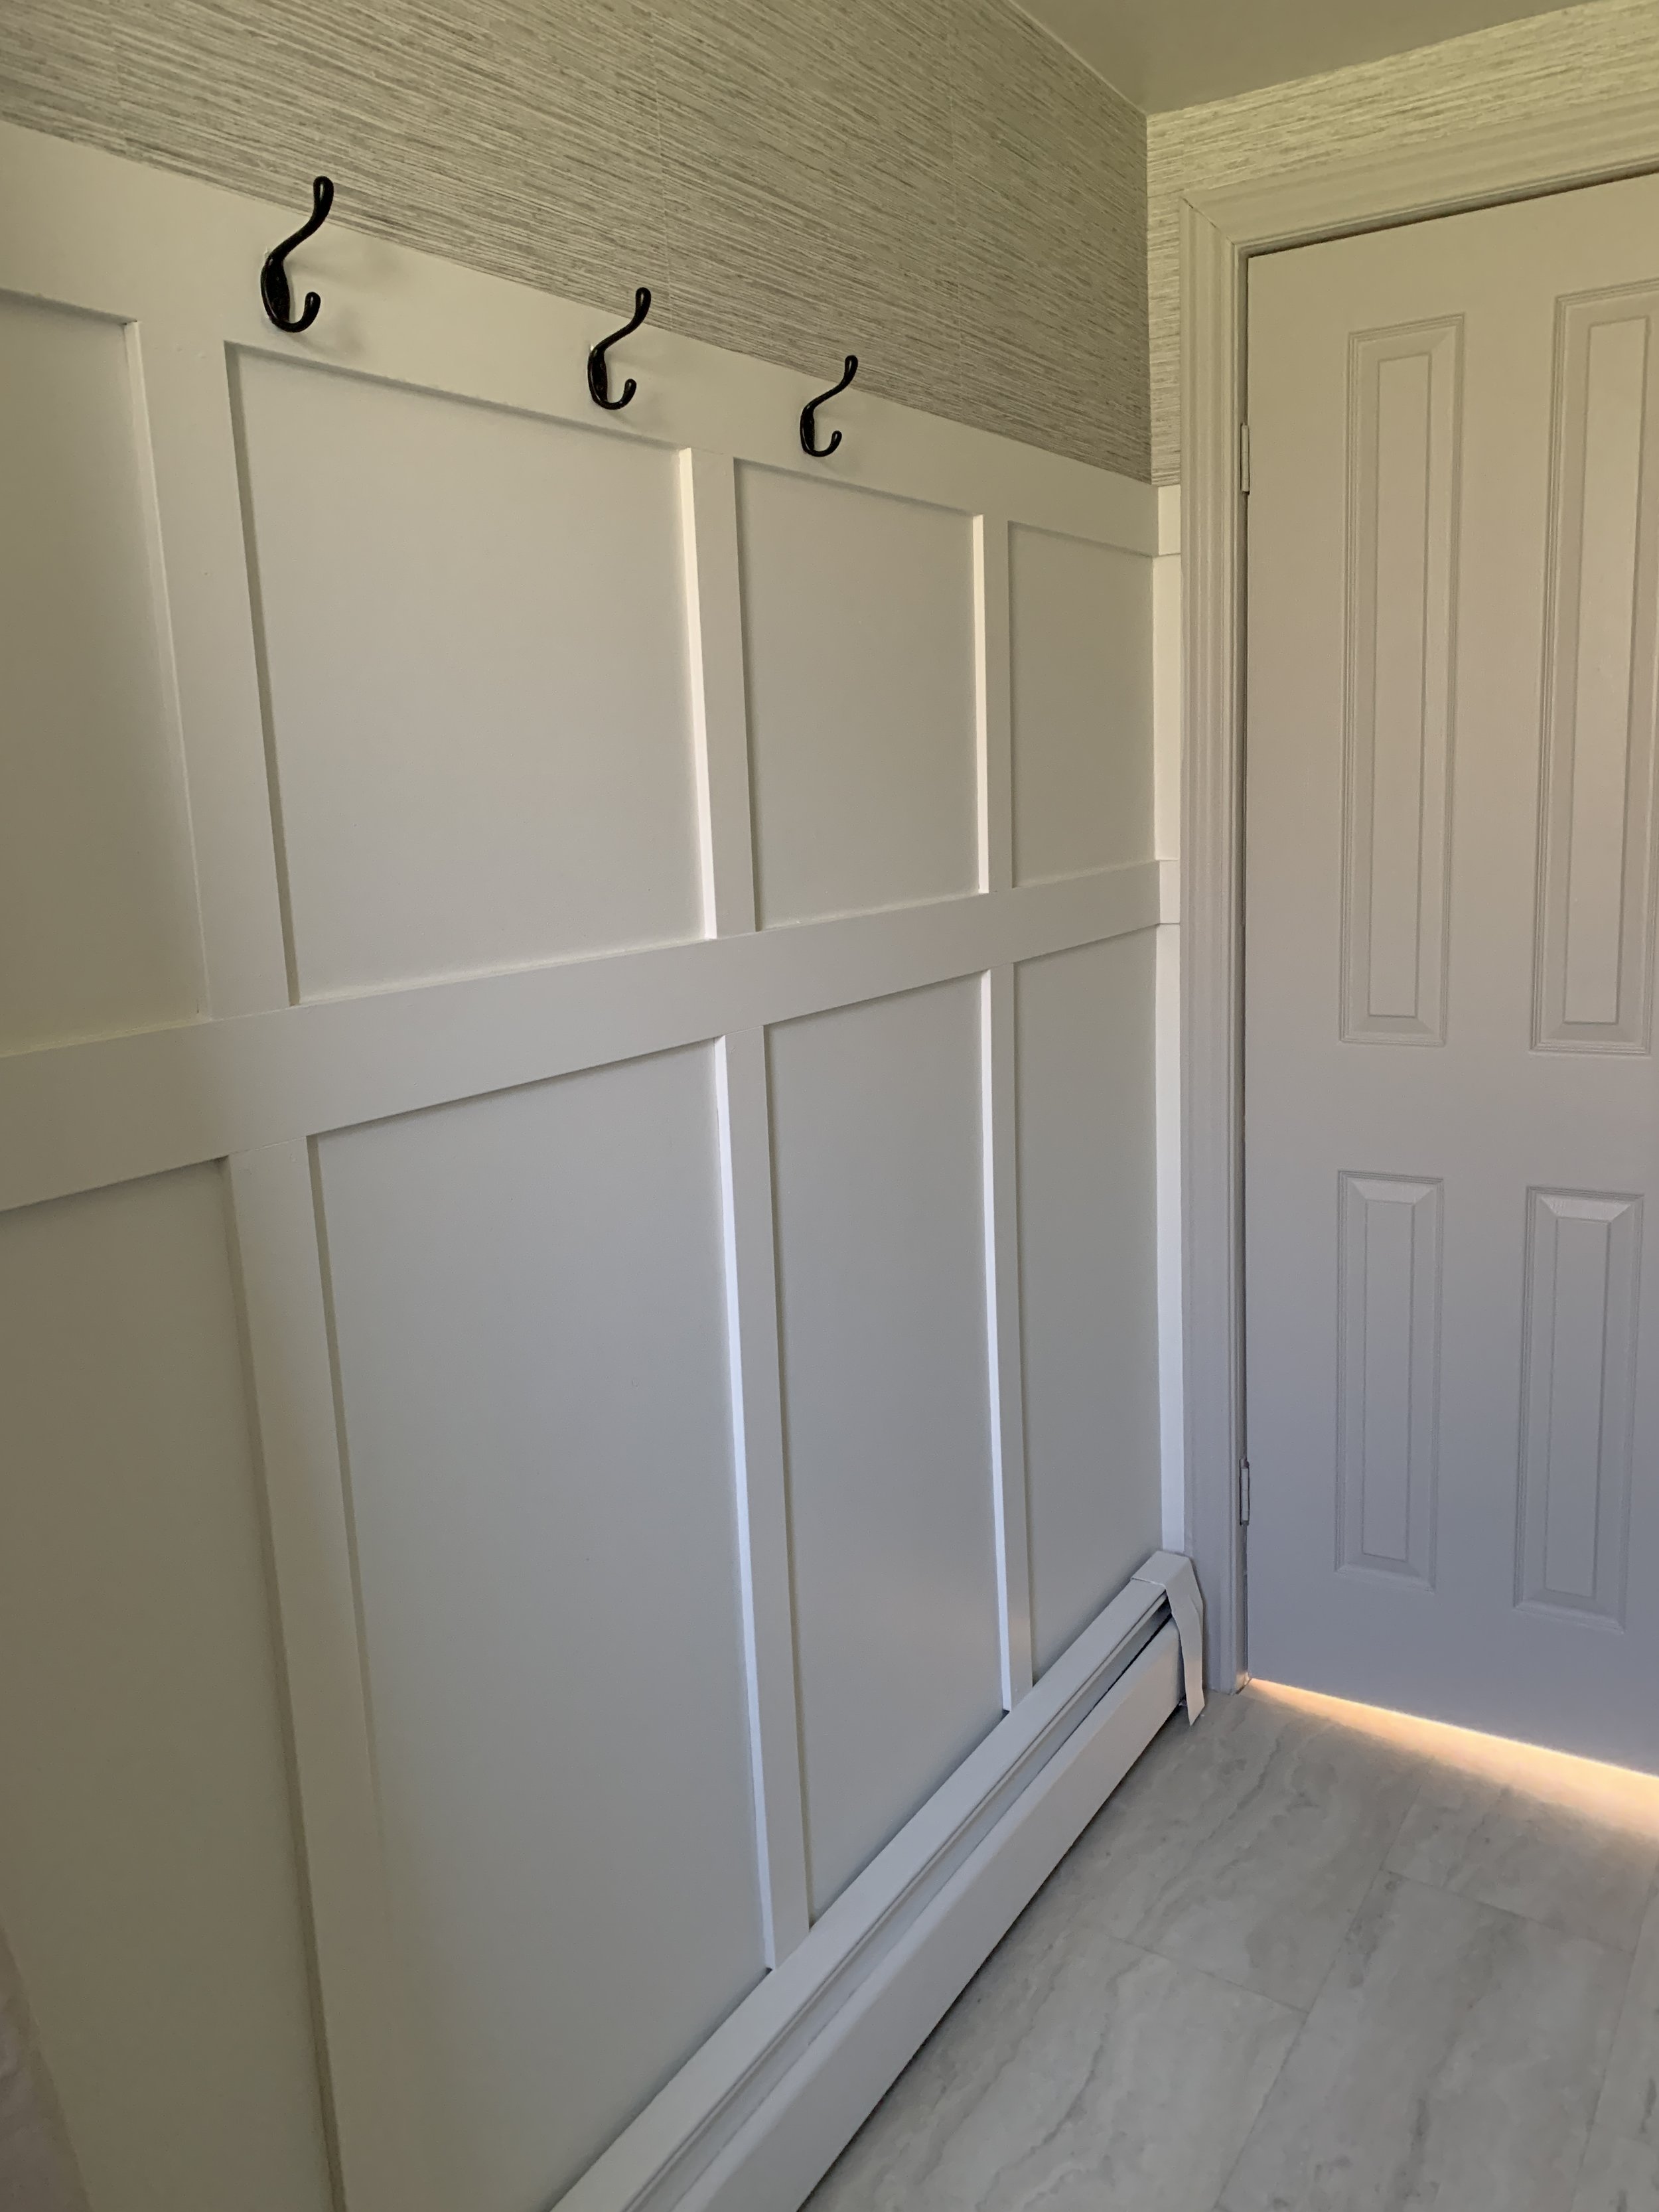
Things I knew I wanted to address was the lack of character and detail in the space. We had a chair rail that went around the room but it was installed at an awkward height. My fix for this was to install board and batten using 1x3 and 1x4 pre-primed MDF trim. This also gave us something to install hooks onto for towels. (Can you believe this bath didn’t have anything to hang a towel onto!).
I decided to wrap the board and batten around both sides of the space. To add some texture and visual interest, I installed a peel and stick faux grasscloth wallpaper on top. I shared a tutorial on how to install wallpaper here. I painted the board and batten Sherwin Williams Alabaster. The door and trim were painted SW Repose Gray.
Next up, we said good bye to the early 1990’s forest green countertop along with the sink and faucet. I decided to go with a laminate countertop by Wilson Art in Carrera Marble. I had it cut and the ends finished by my local Kent Building Supplies center and it cost me all of $90! I simply gave them my dimensions and requested the backsplash that comes with laminate countertops be removed for a more clean look. Here’s a not so pretty progress pick.
Once the countertop was installed, it was time to tackle the new sink and faucet. I bought both pieces from Amazon. I chose a square vessel sink as our vanity is not your typical 36” height of most vanities today. Adding the vessel sink, brought the height up and it works much better for our family. My son, husband and myself being 5’7” and 5’8”, it’s much more comfortable to stand at the vanity now.
As you can see from the photo above and the mood board, I did a mix of metals in the space. I love the contrast and visual interest of pairing matte black with a brushed brass. You can learn more about mixing metals along with my favorite metal combinations in this blog post.
If you were following along with our progress on social, then you are aware of the mirror debacle. I knew I wanted an arched mirror but finding one here in Canada was proving difficult. Target and World Market both sell the mirror I wanted. So, in typical Marsha fashion being impatient, I bought a round mirror and it was the wrong choice!! It didn’t work whatsoever in the space plus I bought one at 31.5” and due to the placement of the outlet, it couldn’t be centered with the sink and light. I’m no perfectionist but this would not do.
Chance would have it that during one of my visits to our local Home Sense, I found the mirror and it was only $39.99. SCORE!!!
To give our vanity and the linen tower a little more appeal, we added 3” trim to the door fronts to give them that shaker style look. On a Friday night I painted the entire thing in Sherwin Williams Sea Salt. I added a combination of brass knobs and a cabinet latch and love how it looks together.
The overall budget breakdown:
Light $50
Sink $100
Faucet $100
Countertop $90
Trim $300
Wallpaper $55
Shower curtain liners $25 each
Mirror $40
Accessories: $80
Hardware $100
Paint- I used what I had in my inventory
Shower curtains: They are linen curtains I already had
Total: $965
Here’s the after….
And there you have it. For just under $1000 we took this boring, drab bathroom and turned it into a pretty and functional space for our family.
If you’re interested in having a design created for your dated bathroom, check out my design consult with mood board package here.


